

This guide explains how to use a vibration plate from first setup through to building a progressive training routine, covering frequency settings, effective exercises, and safety tips. Whether you're a first-time user or looking to get more from your machine, you'll find practical, step-by-step advice to maximise muscle activation, circulation, and recovery.
A vibration plate can feel a little mysterious the first time you step on one. The platform hums beneath your feet, your muscles fire without you consciously telling them to, and within minutes you're working harder than a gentle stand-still ever produced. It's one of those pieces of kit that genuinely surprises people in the best possible way.
But getting the most from your machine isn't just about switching it on and hoping for the best. Done right, vibration plate training can support muscle activation, circulation, and recovery as part of a well-rounded fitness routine.
This guide walks you through exactly how to use a vibration plate from the moment you unbox it to building a progressive routine you'll actually stick to. Whether you've just invested in a Bluefin Fitness Ultra SLIM or you're eyeing up the 4D Triple Motor plate, the principles are the same: start smart, build gradually, and let the technology do the heavy lifting.
You'll learn how to set up your machine safely, choose the right frequency and speed settings, perform the most effective standing and floor-based exercises, structure your sessions for real results, and know when to push harder and when to ease off.
No guesswork, no wasted sessions. Just a clear, actionable plan that gets you moving with confidence from day one. Let's get into it.
Step 1: Set Up Your Plate and Check Your Safety Basics
Before you even think about stepping on, take five minutes to set things up properly. It's the difference between a session that feels solid and controlled, and one where you're wobbling around wondering if you're doing it right.
Choose the right surface: Position your vibration plate on a firm, level floor. Hard flooring wood, laminate, or tile is ideal. Thick carpet can affect stability and, over time, can impact motor performance, so if your only option is carpet, opt for a thin, low-pile variety. The plate should sit completely flat with no rocking.
Clear your space: Give yourself at least one metre of clear space around the plate in every direction. You'll be shifting your weight, stepping on and off, and eventually performing exercises that require arm movement. Space matters for safety.
Read the manual first: Every Bluefin Fitness plate comes with a model-specific instruction manual, and downloadable versions are available on the Bluefin website. Take ten minutes to read through it before your first session. Settings, maximum weight limits, and recommended session lengths can vary between models, so don't skip this step.
Wear the right footwear: Supportive, flat-soled trainers are the best choice for most sessions. They provide grip during dynamic movements and help distribute vibration evenly through the foot. Bare feet are fine for lower-intensity or recovery sessions, but once you're adding squats or lunges, shoes give you a much more stable base.
Know your contraindications: Vibration plate training is not suitable for everyone. If you have a pacemaker, recent surgical implants, acute thrombosis, a serious cardiovascular condition, epilepsy, or if you're pregnant, consult your GP before using a vibration plate. When in doubt, get clearance first. This isn't about being overly cautious, it's about making sure the training works for your body, not against it.
Success indicator: The machine powers on without unusual noise, the display is responsive, and you feel completely stable standing on the platform before any vibration begins. If anything feels off, stop and check the manual or contact Bluefin support before continuing.
Step 2: Understand Your Settings Before You Start Moving
Here's where a lot of beginners go wrong: they step on, crank the speed to maximum, and then wonder why they feel dizzy or sore the next day. Understanding your settings before you start is what separates a productive session from a frustrating one.
Frequency explained: Vibration plates typically offer speed or frequency settings ranging from lower intensities (around 20 to 30 Hz) up to higher intensities (around 40 to 60 Hz, depending on the model). Lower frequencies are generally associated with relaxation and recovery work. Higher frequencies drive more intense muscle activation. Always start at the lowest setting even if it feels too easy. Your neuromuscular system needs time to adapt.
If you're using the 4D Triple Motor plate: This model offers multi-directional vibration, combining vertical, horizontal, and oscillating movement. This is a genuinely different experience from a single-motor plate. Before each session, check which vibration mode you've selected. Start with a single-direction mode while you're finding your feet, and explore the multi-directional settings once you're comfortable with the sensation.
Amplitude matters too: Frequency gets most of the attention, but amplitude the depth of each vibration movement has a significant impact on intensity. Higher amplitude means the platform moves further with each cycle, which increases the muscular demand considerably. Many beginners don't realise this, so if a lower frequency setting still feels very intense, check whether the amplitude is set higher than it needs to be.
Set a timer and use it: Most Bluefin plates allow you to set a session timer directly from the display or remote control. For your first sessions, set it to 10 minutes. This isn't being timid, it's being smart. Ten minutes of focused vibration training is genuinely effective, and it gives your body a chance to adapt without overwhelming it.
Use pre-programmed modes: Many Bluefin plates include built-in workout programmes that automatically vary intensity throughout the session. These are excellent for beginners because they remove the guesswork and gradually introduce you to different frequency levels in a structured way. If your model has them, start here.
The mistake to avoid: Jumping straight to the highest speed setting. This commonly causes dizziness, nausea, or muscle soreness that puts people off using the plate altogether. Start low, feel the sensation, and build from there.
Success indicator: You can complete a 10-minute session at your chosen setting without dizziness, nausea, or joint discomfort. If you experience any of these, reduce the frequency and check your stance which brings us to the next step.
Step 3: Master the Foundational Standing Positions
Think of the standing positions as your foundation. Everything else the squats, the stretches, the progressive exercises builds on how well you've mastered these basics. Get them right and you'll feel the difference immediately.
The basic stance: Stand with feet shoulder-width apart, knees slightly bent (never locked), weight evenly distributed across both feet, and your core lightly engaged. Think of it like you're about to sit down but you've stopped halfway. This position allows the vibration to travel through your muscles rather than directly into your joints, which is exactly what you want.
Avoid standing completely upright with straight legs. It might feel more natural, but locked knees transfer vibration directly into the joint rather than absorbing it through the surrounding musculature. Physiotherapists and fitness professionals consistently highlight this as the most important technique point for vibration plate use. Soft knees, always.
Three essential positions to practise:
- Basic stance (feet shoulder-width apart): Your starting point for every session. Provides full-body activation with a manageable balance challenge. Hold for 30 to 60 seconds, step off, rest briefly, and repeat.
- Narrow stance (feet together): Brings the feet closer together to increase the balance challenge and intensify the sensation. This is a natural progression once the basic stance feels comfortable. The same bent-knee rule applies.
- Wide stance (wider than shoulder-width): Targets the inner thighs and glutes more directly. Toes can point slightly outward. This is a great option for anyone focused on lower body work.
Hold each position for 30 to 60 seconds at a time, then step off and rest. This interval approach is more effective than standing passively on the plate for the entire session. Your muscles are working hard even in these static positions giving them a moment to recover between sets.
Posture tips: Keep your gaze forward, not down at your feet. Looking down shifts your centre of gravity and can affect your balance and posture. Shoulders back, chest open, core engaged. If your model has a handlebar, place one hand lightly on it when you're first finding your balance. Once you feel stable, let go and let your body do the work.
Success indicator: You can hold each of the three positions for a full 60 seconds without needing to grip for support and without feeling unstable. When you reach this point, you're ready for the next stage.
Step 4: Add Dynamic Exercises to Increase Results
Once you've spent one to two weeks getting comfortable with the standing positions, it's time to introduce movement. This is where vibration plate training starts to feel genuinely exciting. The combination of active exercise and vibration creates a muscle recruitment challenge that's hard to replicate with standard bodyweight training alone.
The golden rule for all dynamic exercises on a vibration plate: move slowly and deliberately. Momentum and rushing increase injury risk. Let the vibration do the work; your job is to control the movement.
Squats on the plate: Start in your basic stance. Lower yourself slowly into a squat, aiming for around 90 degrees of knee bend if your mobility allows. Hold the squat position for 20 to 30 seconds, then slowly return to standing. The vibration significantly increases muscle recruitment compared to holding a static squat on solid ground. Rest, then repeat for 3 rounds.
Calf raises: Stand in a basic stance and rise slowly onto your toes. Hold at the top for two seconds, then lower slowly back down. This is excellent for lower leg strength and circulation, and the vibration adds an extra balance and activation element. Aim for 10 to 15 controlled repetitions.
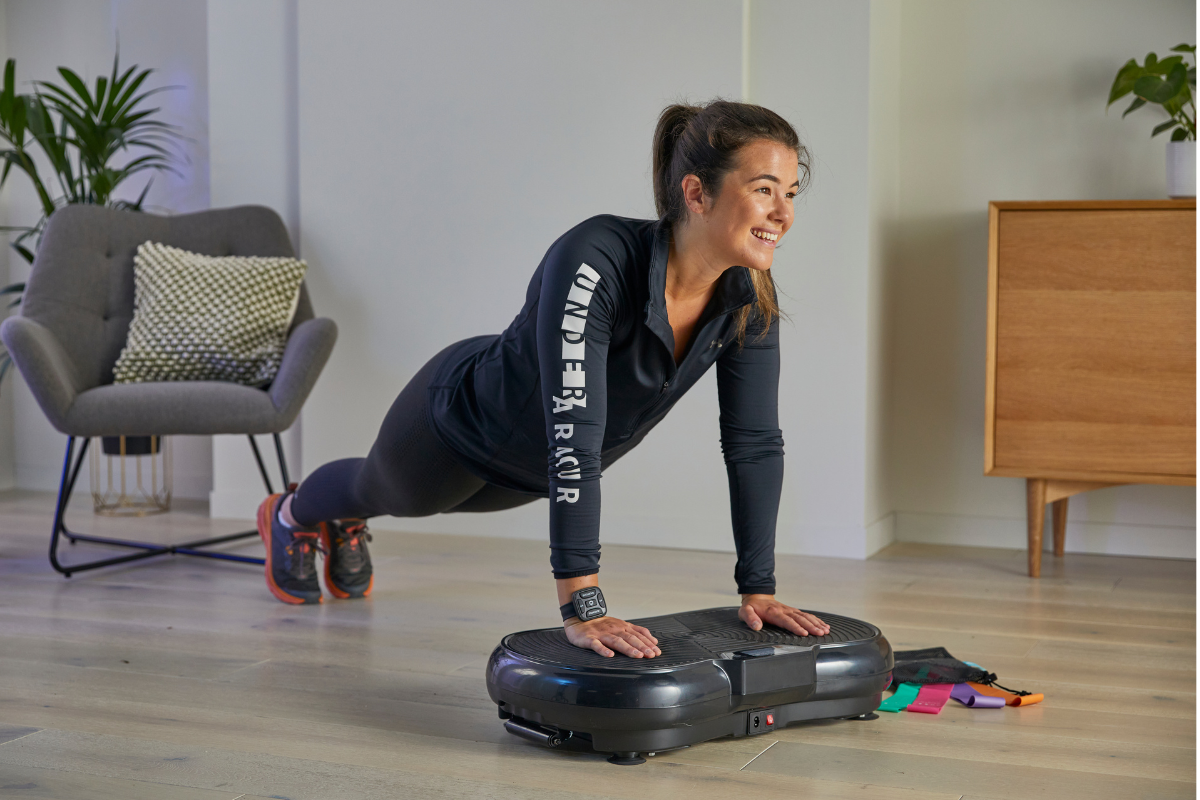
Plank on the plate: Place your forearms or hands on the platform surface while your feet remain on the floor behind you. Yes, your hands go on the plate, not the floor. The vibration travels through your arms and into your core, making this a significantly more challenging plank than the standard version. Start with 20-second holds and build from there.
Static lunge: Step one foot onto the plate and place the other foot behind you on the floor. Lower into a static lunge position and hold for 20 to 30 seconds. Do not perform walking lunges on the plat the instability makes this unsafe. Keep it static, keep it controlled.
Push-ups with hands on the plate: Similar to the plank position, but you perform a controlled push-up with hands on the vibrating surface. The instability challenge increases upper body and core activation considerably. Start with a small number of slow, controlled reps and build up over time.
Structure your dynamic sessions: Choose 3 to 4 exercises per session. Perform each for 20 to 30 seconds (or the specified rep count), rest for 30 seconds between exercises, and complete 3 rounds total. This gives you a structured, progressive session without overdoing it.
Success indicator: You can complete 3 rounds of 3 to 4 exercises with 30-second rest periods between rounds, maintaining good form throughout. If your form is breaking down, reduce the number of rounds before increasing them again.
Step 5: Use the Plate for Targeted Recovery and Flexibility Work
This is the step that surprises most people. A vibration plate isn't just a tool for working harder it's one of the most effective tools you have for recovering smarter. Used at low frequency, it can transform your warm-up and cool-down, and make a noticeable difference to how your muscles feel after training.
Pre-workout warm-up (3 to 5 minutes): Set the plate to one of the lowest two or three frequency settings. Stand in your basic stance and simply let the vibration increase blood flow to your muscles. This gently prepares the body for exercise without fatiguing it. Think of it as pressing the accelerator gently rather than flooring it; you're warming the engine, not burning it out.
Post-workout cool-down: After your main session, sit on the edge of the plate or position the back of your calves against the vibrating surface. This passive contact at low frequency helps relax tight muscles and can ease the post-exercise tension that builds up during strength or cardio work. It feels genuinely good, and it takes almost no effort.
Seated hamstring stretch: Sit on the floor directly in front of the plate. Place your heels on the platform surface and reach forward toward your toes. The vibration enhances the stretch by encouraging the muscle to relax and lengthen more effectively than static stretching alone. Hold for 30 to 60 seconds per side.
Standing quad stretch: Stand on one foot on the plate and hold the opposite ankle behind you in a standard quad stretch. The vibration challenges your balance while simultaneously helping to release tension in the quadriceps. Use the handlebar or another surface for support if needed; the balance element here is secondary to the stretch quality.
Massage mode: Select Bluefin models include a dedicated massage or low-frequency mode designed for targeted muscle recovery. Place the muscle group you want to target calves, hamstrings, lower back in contact with the platform and allow the low-frequency vibration to work through the tissue. This is particularly effective for calves and the lower back after a long day on your feet.
Success indicator: Your muscles feel noticeably looser after a vibration-assisted cool-down compared to static stretching alone. If you're not feeling a difference, try dropping to an even lower frequency setting more intensity isn't the answer here.
Step 6: Build a Weekly Routine That Delivers Progressive Results
Knowing how to use a vibration plate is one thing. Building a routine that actually delivers results over time is another. Progression is everything and the good news is that it doesn't need to be complicated.
Weeks 1 to 2 (Foundation): Three sessions per week, 10 minutes each. Low frequency settings only. Focus exclusively on the three foundational standing positions from Step 3. Your only goal during these two weeks is to get comfortable with the sensation and build confidence on the plate. Don't rush past this phase; it matters more than it might seem.
Weeks 3 to 4 (Development): Three to four sessions per week, 15 minutes each. Introduce the dynamic exercises from Step 4 squats and calf raises are the natural starting points. Increase your frequency setting by two to three levels from where you started. Begin incorporating a short warm-up and cool-down using the recovery techniques from Step 5.
Week 5 onwards (Progression): Four to five sessions per week, 20 to 30 minutes including warm-up and cool-down. Mix dynamic exercises, standing positions, and targeted stretching or recovery work within each session. Continue increasing frequency settings as sessions start to feel comfortable rather than challenging. This is your ongoing training framework, adjust it to fit your goals and schedule.
The 30-minute ceiling: Never use a vibration plate for more than 30 minutes in a single session. More is genuinely not better with vibration training. Diminishing returns set in quickly, and overuse can lead to neuromuscular fatigue that leaves you feeling worse rather than better. Keep sessions focused and within this limit.
Rest days are part of the programme: Allow at least one full day between higher-intensity vibration sessions. Lower-intensity recovery sessions can be done more frequently, but your muscles still need time to adapt and rebuild. Consistency over weeks matters far more than cramming in daily intense sessions.
Track your progress: Keep a simple note of which speed settings feel challenging versus comfortable, and which exercises you can now hold for longer. These are real, meaningful markers of improvement. Progress on a vibration plate isn't always visible in the mirror immediately but it shows up in your ability to hold positions longer, use higher settings, and recover faster.
Combine with other training: Vibration plate sessions work brilliantly alongside walking, yoga, and resistance training. They are not a replacement for cardiovascular exercise, but they complement it well. Think of your plate as a powerful addition to your existing routine, not a standalone solution.
Success indicator: By week 6, you're completing 20-minute sessions with a mix of exercises at mid-range frequency settings without significant fatigue. If you're there, you've built a solid foundation and from here, the sky's the limit.
Your Vibration Plate Journey Starts Now
You've got everything you need. Here's your quick-reference checklist before every session:
Firm, level surface: Check. Safety check complete: Check. Lowest settings first: Check. Bent knees, always: Check. 10 minutes to start: Check. Build gradually over weeks: Check.
The core principle behind all of this is simple: consistency beats intensity every single time. Three short, well-executed sessions per week will deliver far better results than one long, carelessly done session. Your body adapts through repetition and progressive challenge not through pushing to the limit in one go.
For model-specific guidance, head to the Bluefin Fitness website to download the instruction manual for your plate. The FAQ section is also a great first port of call if you have questions about settings, maintenance, or exercise recommendations for your specific model. If you're still deciding which plate is right for you, the Bluefin quiz tool can help match your goals to the right machine.
Don't forget to register your warranty after purchase for complete peace of mind.
The hardest part is stepping on for the first time. After that, it gets easier, more enjoyable, and more effective with every session. Learn more about our services and find the vibration plate that fits your goals, your space, and your lifestyle.
Share:
Whole Body Vibration: What It Is, How It Works, and Why It Belongs in Your Home Gym